Disclaimer: This post contains affiliate links. To learn more about how affiliates work on this site, click here.
Hey everyone! I hope you are doing well and are staying safe.
Since we are focusing on writing for this month, I thought I would share with you some of my all time favorite tools for writing. I know how hard it can be to find tools that work for you, your style of creating pieces, and even your vision. It’s important to know what tools are available, because how can we take advantage of a tool if we don’t even know what it is or how we can use it? So not only will I share my go to tools for creating posts, stories, etc. but also how I use them. Also, I use a MacBook and iPad for my business, so most of these tools will be for those devices specifically. I hope you are able to find a new tool or learn how to better use an existing one from the post! Let’s get right into it!

FOR THE ACTUAL ACT OF WRITING
Pages- Word Documents
I’ve used Pages for a long, long time. It may seem like an obvious choice for writing my posts and ideas, but it’s a tried and true program. Plus, if you have an Apple device, it’s free and compatible on all Apple devices, making it easy to edit documents on the go. It’s simple to use, and makes it easy to write out long posts, brainstorm ideas, or put down first drafts of novels.
I’ve also learned better ways to use Pages over time, and my favorite trick is changing the contrast. With my vision, I find it easy to work with white text on a black page. Pages doesn’t have an existing setting for this, you have to go in and manually create a black page. Here’s how:
- Go to the files tab and covert to a pages layout.
- Go under the format tab, and click edit master page.
- Choose your background color and save.
- Go back to files and click save as template.
And now you have a contrast friendly pages document, all you have to do is change the font color!
Procreate- Concept Sketches and Storyboarding
Procreate is one of my favorite apps in general, but I also love it for creating quick storyboards or concept sketches. It’s especially helpful using the layers feature, which allows you to build upon each element while keeping the original designs intact. I use it for those quick ideas I want to capture, but don’t necessarily have a specific place for.
It is a paid app and is only available for IOS, but it is completely worth it. I love how easy it is to get started with, and how you can continue to learn new features and tricks on using the app. I also love the variety of brushes, textures, colors, and features. You can never get bored with it, and it makes a great tool for designing characters, settings, etc.
In my last post, I shared the reasons why I’m choosing to do a graphic novel. With that format, there are a lot of visual elements to the storytelling. Even though I’m not the one doing the final artwork, I still like sketching out rough ideas because it helps me get a sense of where the story is going, and the overall style I want it to be in. It can also help with deciding what the artist has free reign on. If there’s an area where I need a specific theme etc. I can see that represented and then be able to give those cues to the artist. Storyboarding is also great for plotting your novel and for sorting out the details. With procreate, I can create a document and then zoom in to create each seperate panel.
Another great feature of procreate is that you can create folders to store similar pieces together. Here’s how:
- Press and hold on one of your pieces.
- Once it’s selected, drag and drop in on top of another piece you want in that folder.
- Continue with any other pieces, and then click the “stack” text to edit the name of the folder.
World Anvil- For Brainstorming And Plot Development
I’ve mentioned World Anvil several times on my blog, and it’s because I absolutely love their site. I’ve done a whole post on my review of their site and how I use it, and I’ll link that below:
World Anvil Review- Why It’s One Of My Favorite Writing Tools
It’s also great for someone who is visually impaired. They have made this a great resource for those who want to write and worldbuild but don’t have tools that are accessible to them. If that’s your current situation, you need to check out their site.
The main way I use the website is for brainstorming, prompts, and development. I like being able to link my information together and see the connections between each item. It’s also just an easy to use tool which is rare in writing sites.
The main way to get use out of the site is to crate articles for each of your characters, settings, etc. Here’s how you can create a new article:
- Log in to your World Anvil account
- Click the plus button in the bottom right corner
- Select the hammer icon and pick a category
- Write all of the details out and then hit save!
I love using the prompts within each category because it helps fill in those details that you tend to forget about, but are incredibly important. If you’d like to try out World Anvil for yourself, click the link below to see what they offer. I will get a small cut of any purchases you make through the link, which allows me to continue creating content.
Pinterest- Inspiration and Images
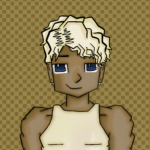
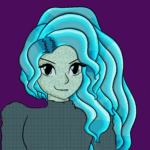
Pinterest is the best tool if you are looking for a specific aesthetic, color scheme, or just inspiration in general. I use it to help in creating my characters and the settings, as well as finding writing tips and articles. For example, I have a board for characters, and sections within that board for each of them. Under Gwen, I have images of blue hair, black outfits, high waisted shorts, lyrics from “reputation”, color palettes, and anything I see that fits her character. It has been the most useful tool for creating those signature styles, and since my novel has the visual element, having these boards helps to combine that element into the script. Here’s a few tips for creating pinterest boards:
- Use sections to organize your ideas under a board
- Look for images that relate to the specific aesthetic. Make a list or brainstorm so that you know what you are looking for.
- Don’t be afraid to change your mind! A lot of Gwen’s outfit design changed after finding images on pinterest of black high waisted shorts and tall boots. It’s okay to go where the pinterest rabbit hole takes you occasionally.
- Have fun with it and use this as a jumping off point, not the final product.

FOR STAYING FOCUSED AND PRODUCTIVE
Listening to Music Without Lyrics
I have found that music helps me stay focused. That is, when there are no lyrics in the song. I get distracted super easily, so if I listen to a song with lyrics I’ll want to sing along, and then it becomes a whole concert reenactment. I also don’t like classical music, and have a hard time with LoFi. So what I listen to is the soundtracks from various Sonic The Hedgehog and Animal Crossing games. I don’t really understand why these help me focus and ONLY these help me focus, but it does the trick. Here are a few of my favorites:
- Sonic: Unleashed Soundtrack
- Sonic 3 And Knuckles Soundtrack
- Sonic Adventure 1 And 2 Soundtracks
- Animal Crossing City Folk Soundtrack
- Animal Crossing for GameCube Soundtrack
My Infamous Planner Page- Write It Down
I get so many ideas throughout the day, and it’s hard to keep track of all of them. If you have read any of my Happy Planner Set Up posts, you might be familiar with one spread I always include in my set ups: my write it down page. I use this page to write down any random thoughts I have throughout the day, and then can go back to it and sort them out later. I highly recommend doing this, even if you don’t have problems with attention or focus, it’s still a really helpful tool.
Pomodoro Technique
This is actually a new one I’ve started using and it’s been a game changer for me. It’s a time management system where you do an amount of work and then take a short break before starting again. I absolutely love the timers that “How To ADHD” has on her youtube channel. Not only are the time limits great, but she is super encouraging after each timer goes off. There’s no judgement on wether you were totally focused, just encouragement that you did your best. If you want any tips on dealing with ADHD or want to learn more about how it works, you should definitely check out her channel, because she also gives resources to help you learn more. And this is one of the tips that have been super helpful.
And that’s it! If you made it to the end, then thank you so much for reading! I hope you were able to learn something new or find a new tool to use. I’ll be posting Reels throughout the next week of how to use each tool mentioned, so make sure you are following me on Instagram!
Also, make sure you are subscribed to my Email newsletter because I’ll be sharing more information and details from the week’s content, which you won’t want to miss!
Until next time 🙂
Recent Comments